
Being able to properly sight in or “zero” a scope is one of those skills that comes in extremely handy, but it can also be incredibly frustrating when it’s going wrong. Don’t worry, though, we’ve got you covered.
Sighting in a scope is the act of aligning where the scope is pointed with where the barrel of the gun is pointed.
Before we can start the sight in process, your scope should be properly mounted and adjusted. Then you need to determine what distance you want your scope sighted in to. We recommend either 50 or 100 yards. If you’re planning on zeroing your rifle at a longer distance like 200 or 300 yards, we recommend performing the initial sight-in at a shorter distance. Then once on paper, adjusting the scope to get your longer-range zero.
There are many different types of tools sold to help with sighting in an optic, but for this article, we’re going to cover bore-sighting, which can be done quickly with no specialized tools.
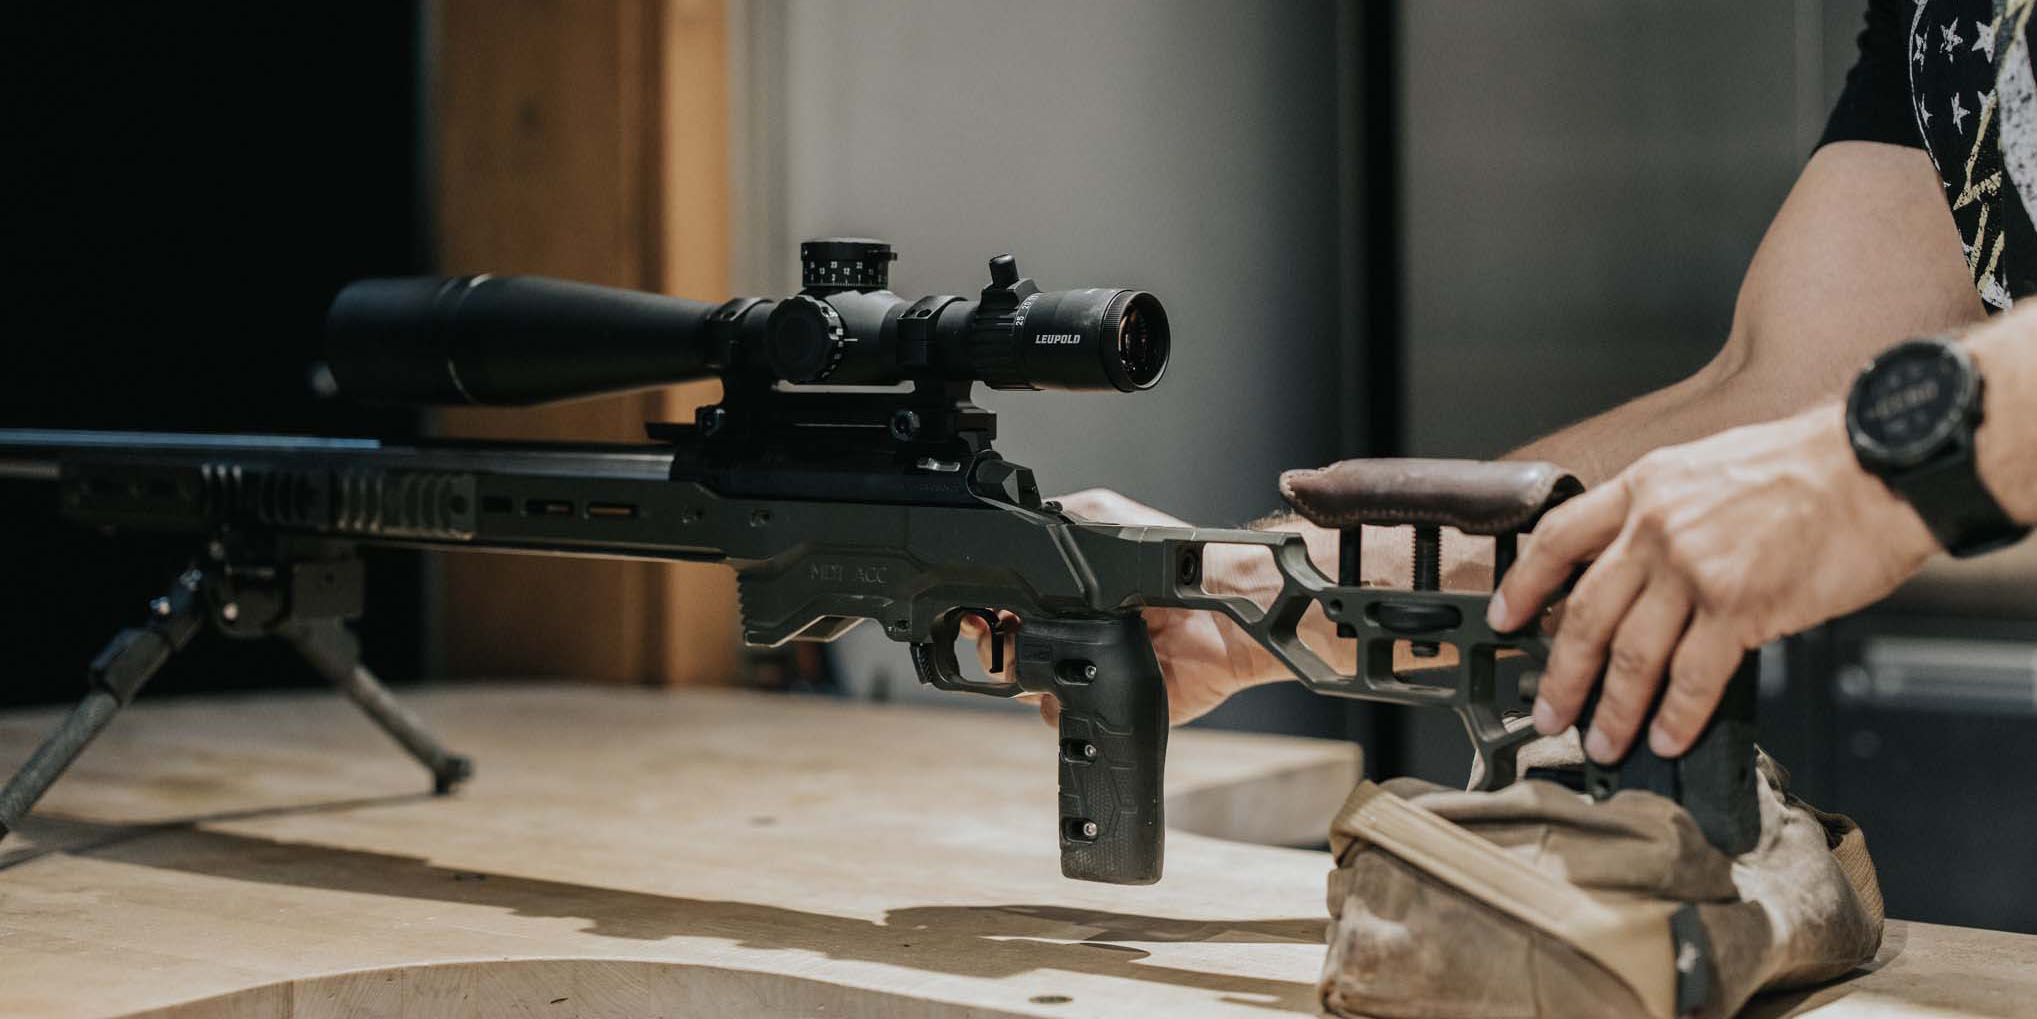
The key to sighting in a scope quickly and efficiently is to use an extremely stable platform. Most ranges have solid shooting benches, which work great as long as it doesn’t move around. The other item you need is a good rest for the rifle. This can be a gun vice or just some shooting bags. But again, whatever you use, make sure it’s stable.
With bore-sighting, you’ll actually be looking down the bore or barrel of the gun to get the scope aligned. For a bolt-gun, simply remove the bolt and you should have a clear view down the barrel. For AR type rifles, make sure the bolt is forward, remove the two pins that hold the upper to the lower, pull them apart, and then remove the bolt. You should now have just the upper without a bolt, so you can see down the barrel.

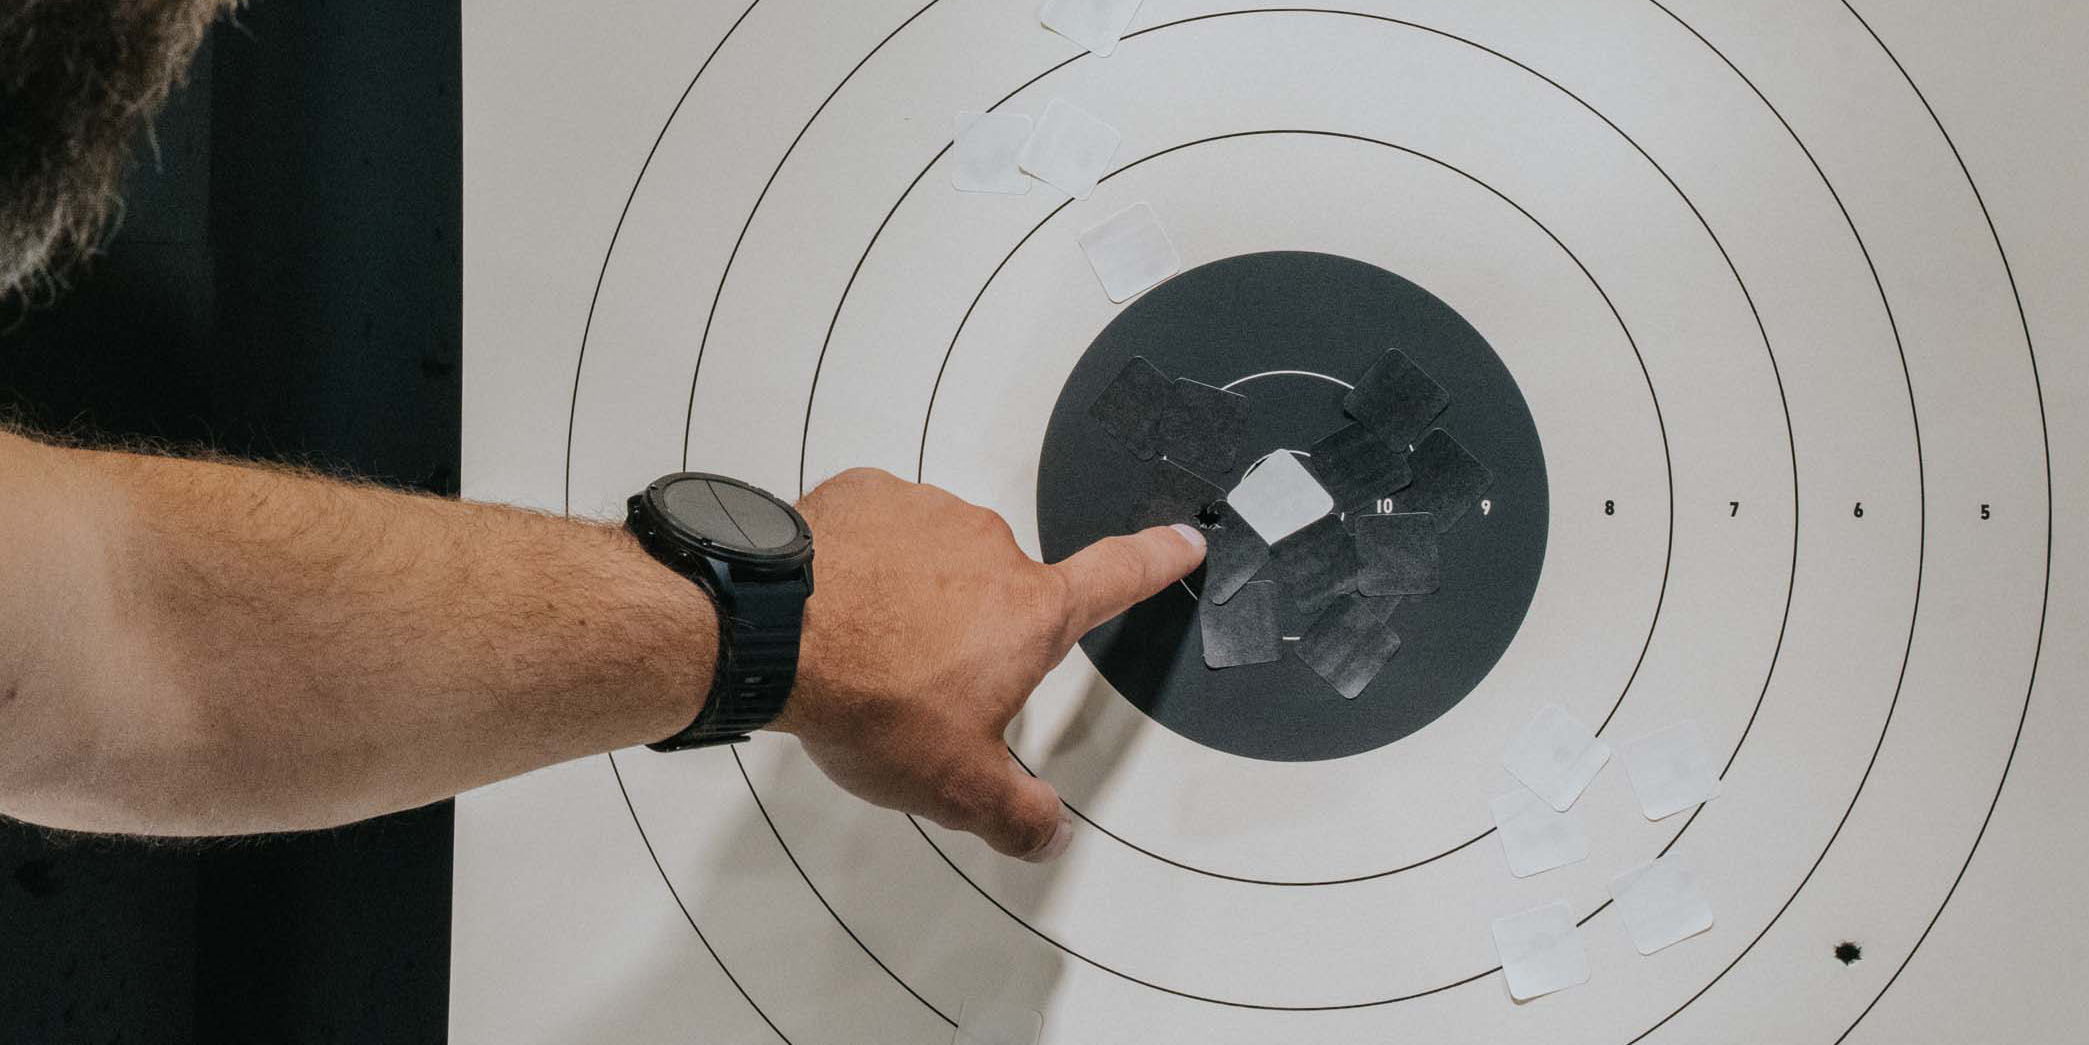
Place the rifle or upper on whatever rest you’re using and point it towards the target. We recommend using a large, high contrast target like the NRA SR-1. This target has a nice black center against a light background, which makes the sight-in easier.
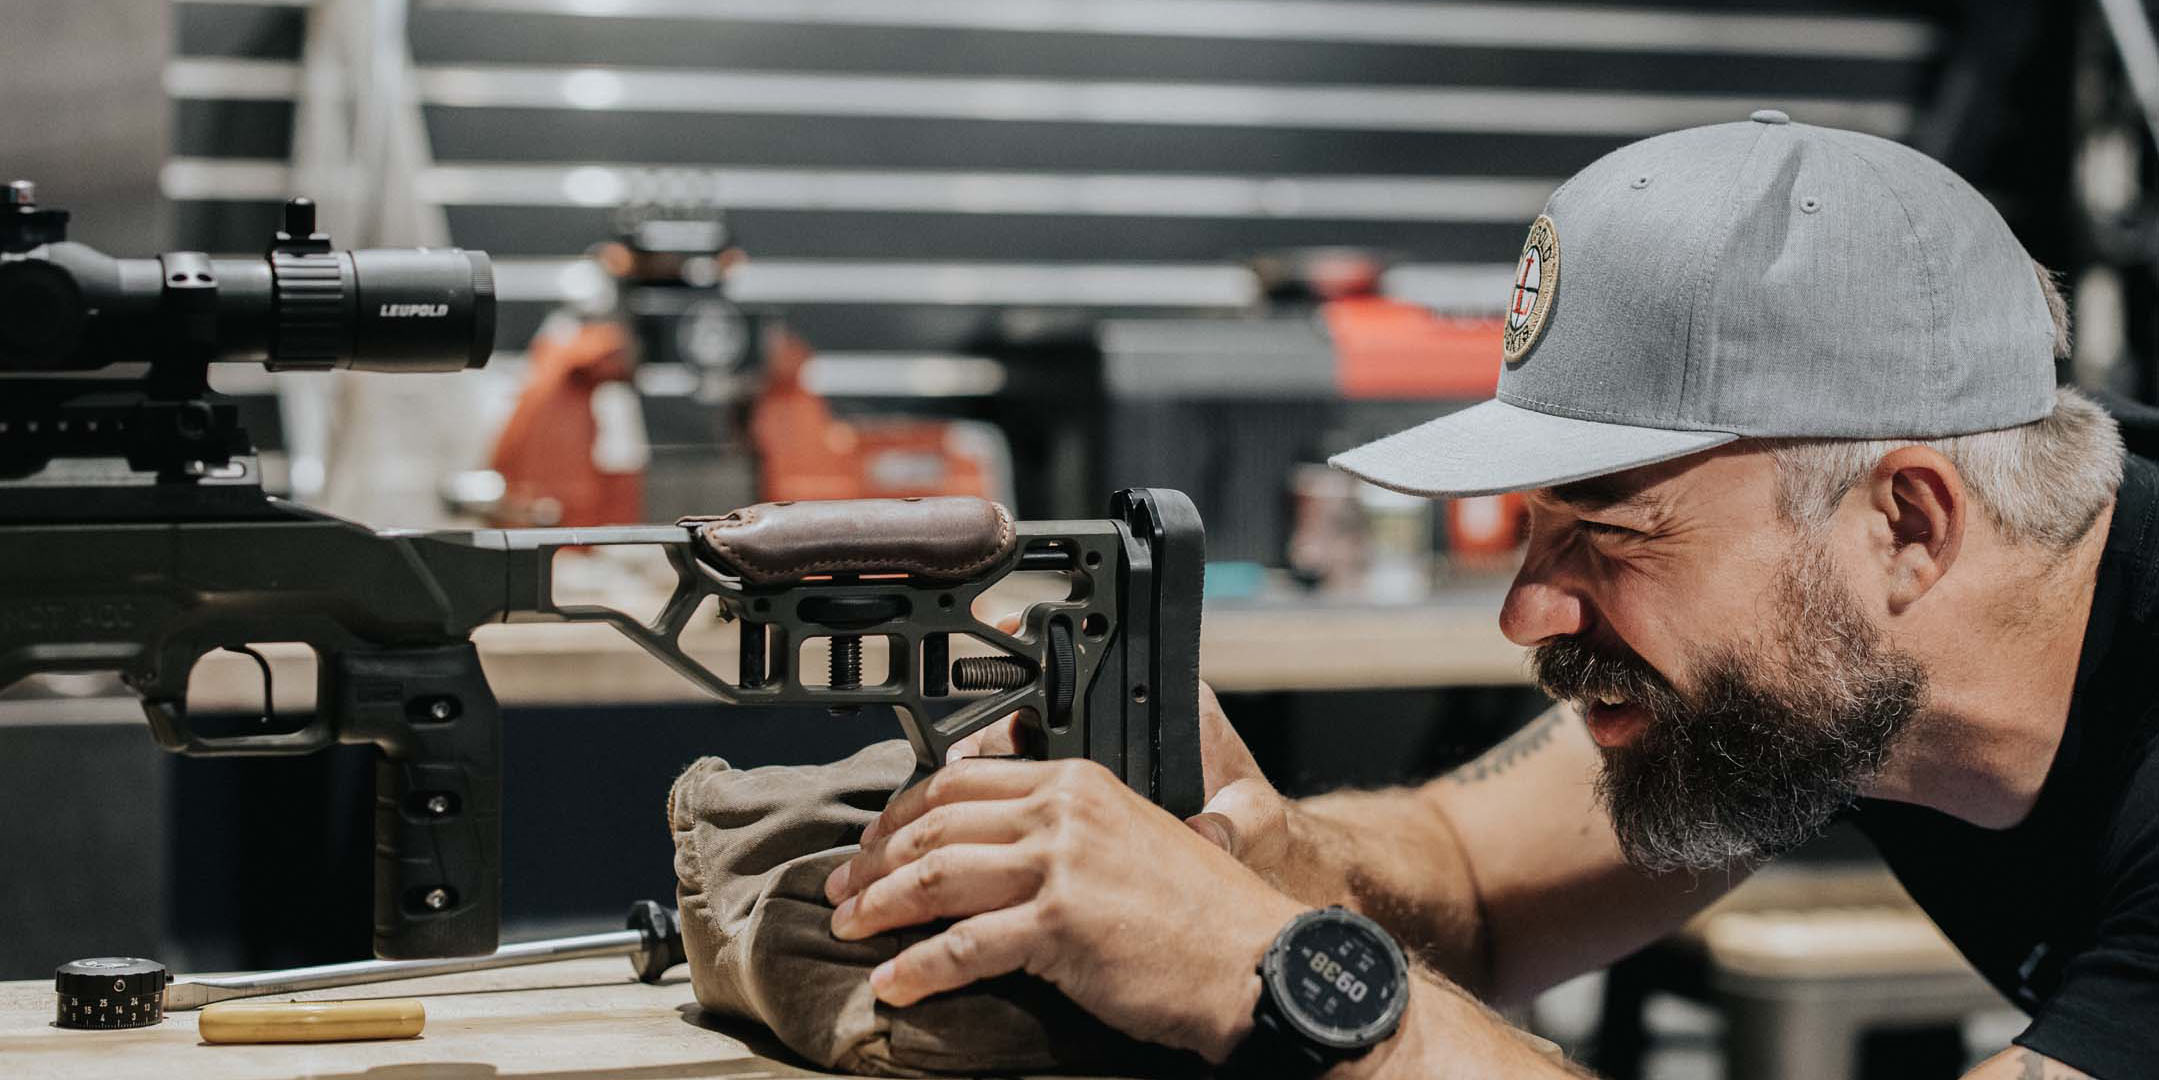
With the firearm in the rest and your target at the desired sight-in distance, look directly through the barrel and move it around until you find the target. Once on target, align the center of the target so it appears to be in the center of the bore (this is where that big black dot target comes in handy, as you can bracket it exactly in the middle of the bore). Once you’re happy with the alignment, make sure you don’t move the gun.
Now that the bore is aligned with the target, you need to align to scope, as well. Without touching the rifle or upper, look through the scope to see where the reticle is pointed. You won’t be able to get your face down in your usual shooting position (since you don’t want to move the gun), but you can still see through the scope. While looking through the scope, adjust your windage and elevation adjustments until the reticle is aligned with the center of the target.

You may have to perform this several times - even the best of us move the rifle a bit when we’re adjusting the scope. After centering the reticle, look back through the bore to see if it’s still aligned. If it’s not, re-align the bore to the target and adjust the reticle again. Repeat this until both are aligned on the same spot.
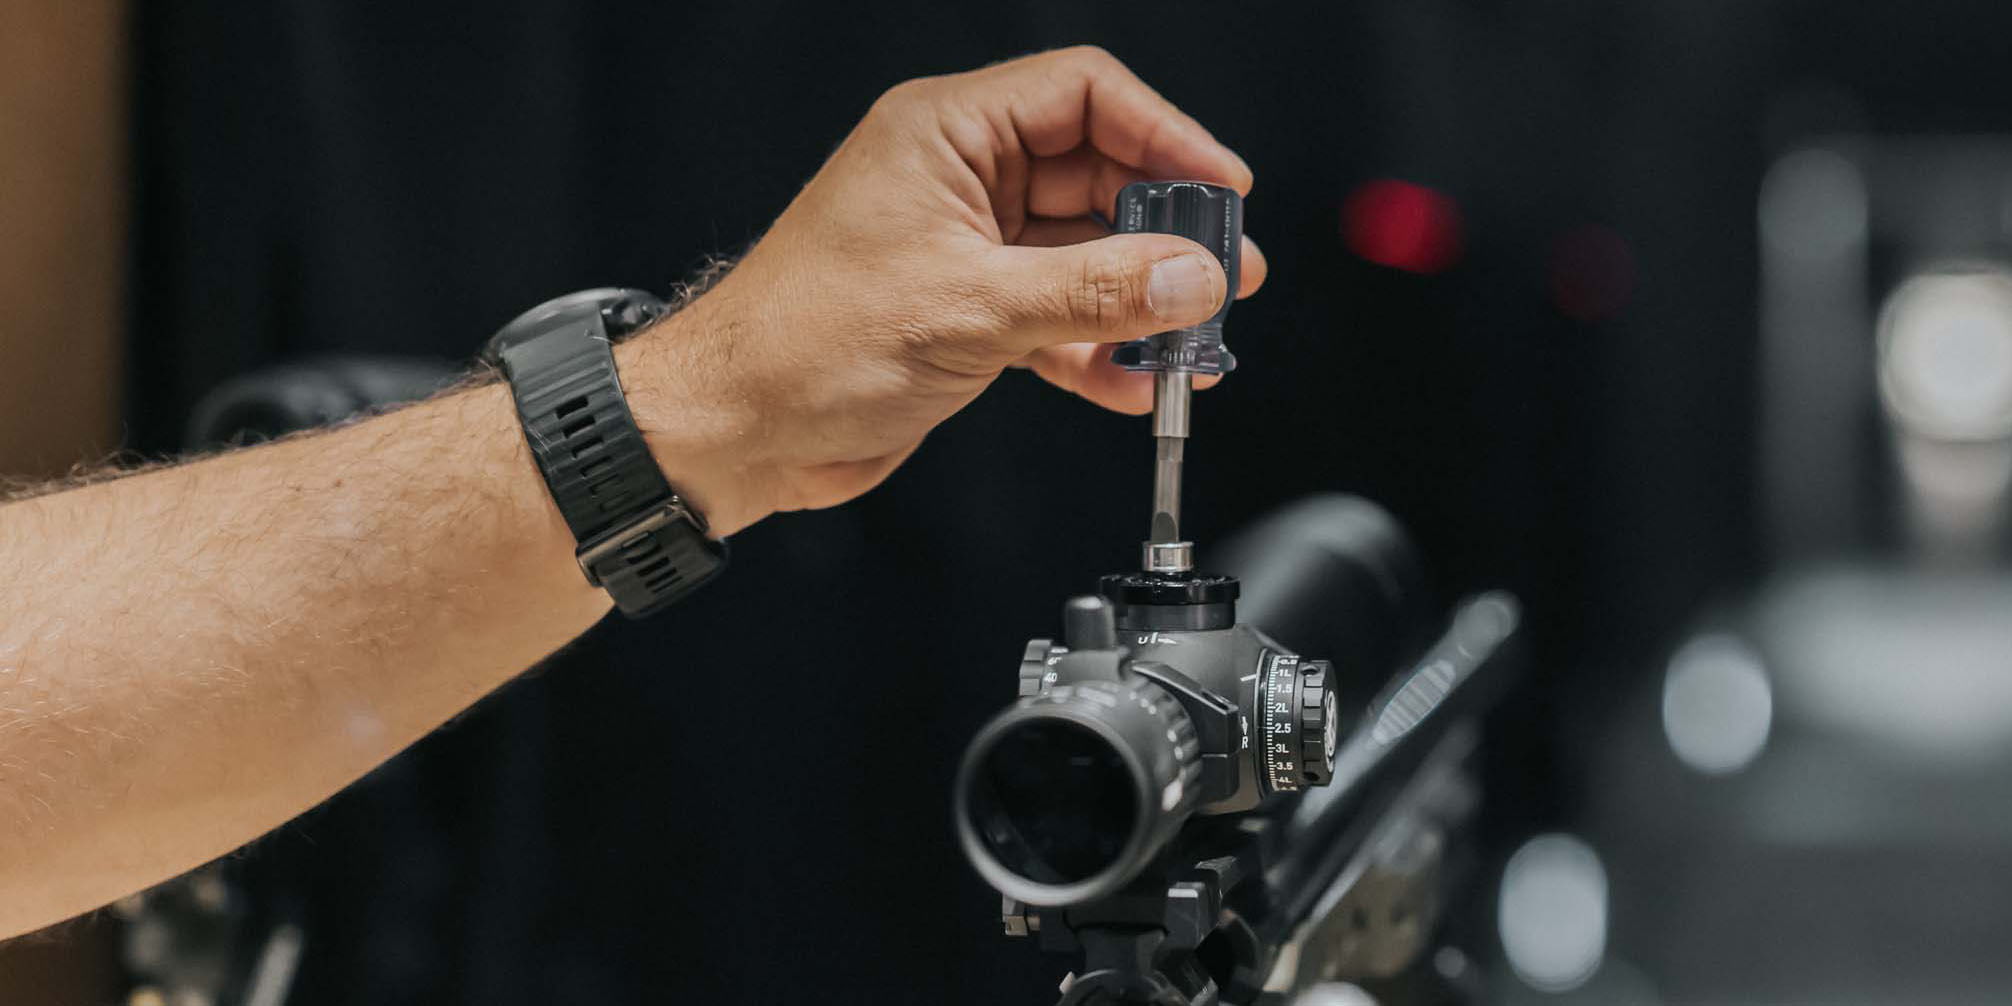
Once you’re happy with bore-sight, re-install your bolt or assemble your upper and lower. Rarely (if ever) is a bore-sight perfect. It’s only intended to get you on target. You can make precise adjustments from there. Fire a shot down range. Following the markings on the scope or adjustments – R for right and U for up, make the appropriate adjustments to get your group where you want it. On a Leupold scope, the adjustment direction changes the point of impact. So if you miss one inch to the right and your scope has ¼ MOA per click adjustments, adjust your windage four clicks in the direction the L is pointing (assuming your sighting in at 100 yards). This will move your point of impact to the left. Shoot several rounds after each adjustment to make sure your group is moving in the right direction.
After you’re happy with your group, you’ll want to “zero” your dials out - after all this adjustment, they won’t be at the “0” marks anymore. This process depends on your scope type (refer to your user manual), but most scopes have set screws that you loosen to reset the dial or dials that simply pop up. Turn the dial (without engaging the adjustment under it) back to the “0” on the dial and tighten the screws back in (or pop the dial back down, depending on the model).
TIPS:
- If you’re having trouble getting rounds on paper, try putting up several targets to make your impact area bigger. Once you can see one hole, you’ll know what direction you have to adjust your scope to get centered up
- If you have to use a large amount of windage adjustment to get on paper, there may be an issue with the rings and bases. Dialing the windage that far will have a negative impact on the amount of elevation adjustment that the scope has, so it’s a good idea to re-install the rings and bases to see if the problem persists. If it does, you may have to take it to a gunsmith.
- If you’re having trouble seeing the center of the target, try bright orange or green target stickers to help guide your eye.