

How To Adjust Your Riflescope
How To Adjust Your Riflescope
A riflescope can be an intimidating piece of gear. A lot of people have it mounted at the local gun shop then never touch it again. But if you familiarize yourself with a couple of key techniques, adjusting your riflescope and even moving it between rifles can be quick and painless. As always, before you adjust anything, make sure your rifle is completely unloaded and that the environment is made safe before proceeding.
We recommend using a universal barrel leveling system. This is done before mounting the scope or installing the rings. Make sure the rifle is on a solid, secure surface and use a rear bag or rest to prop up the buttstock end of the rifle to get is as level as possible.
When adjusting your riflescope to work best for you, there are three main aspects to consider; getting the right eye relief, making sure the scope is level, and lastly, fine-tuning the scope's eyepiece focus. Let's take a closer look at these important factors.
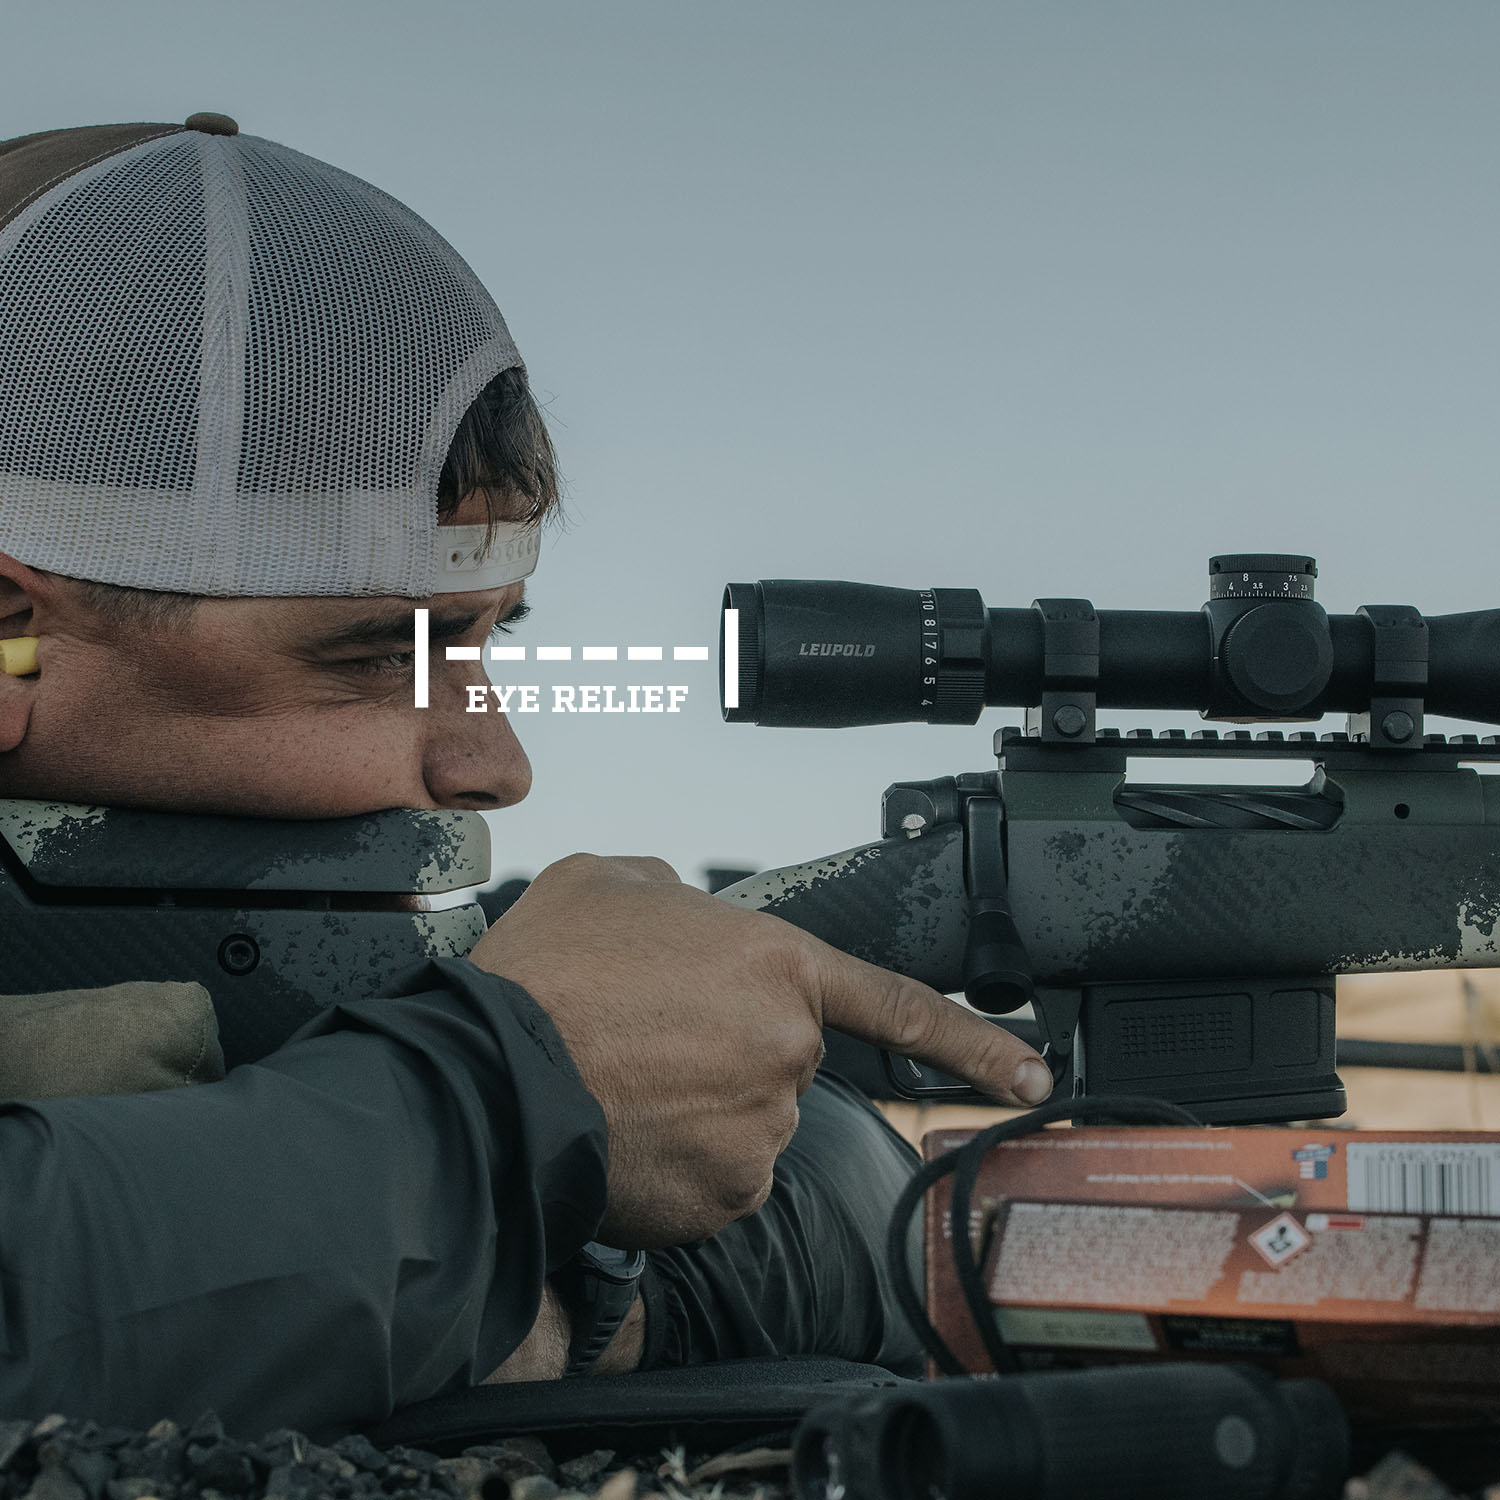
EYE RELIEF
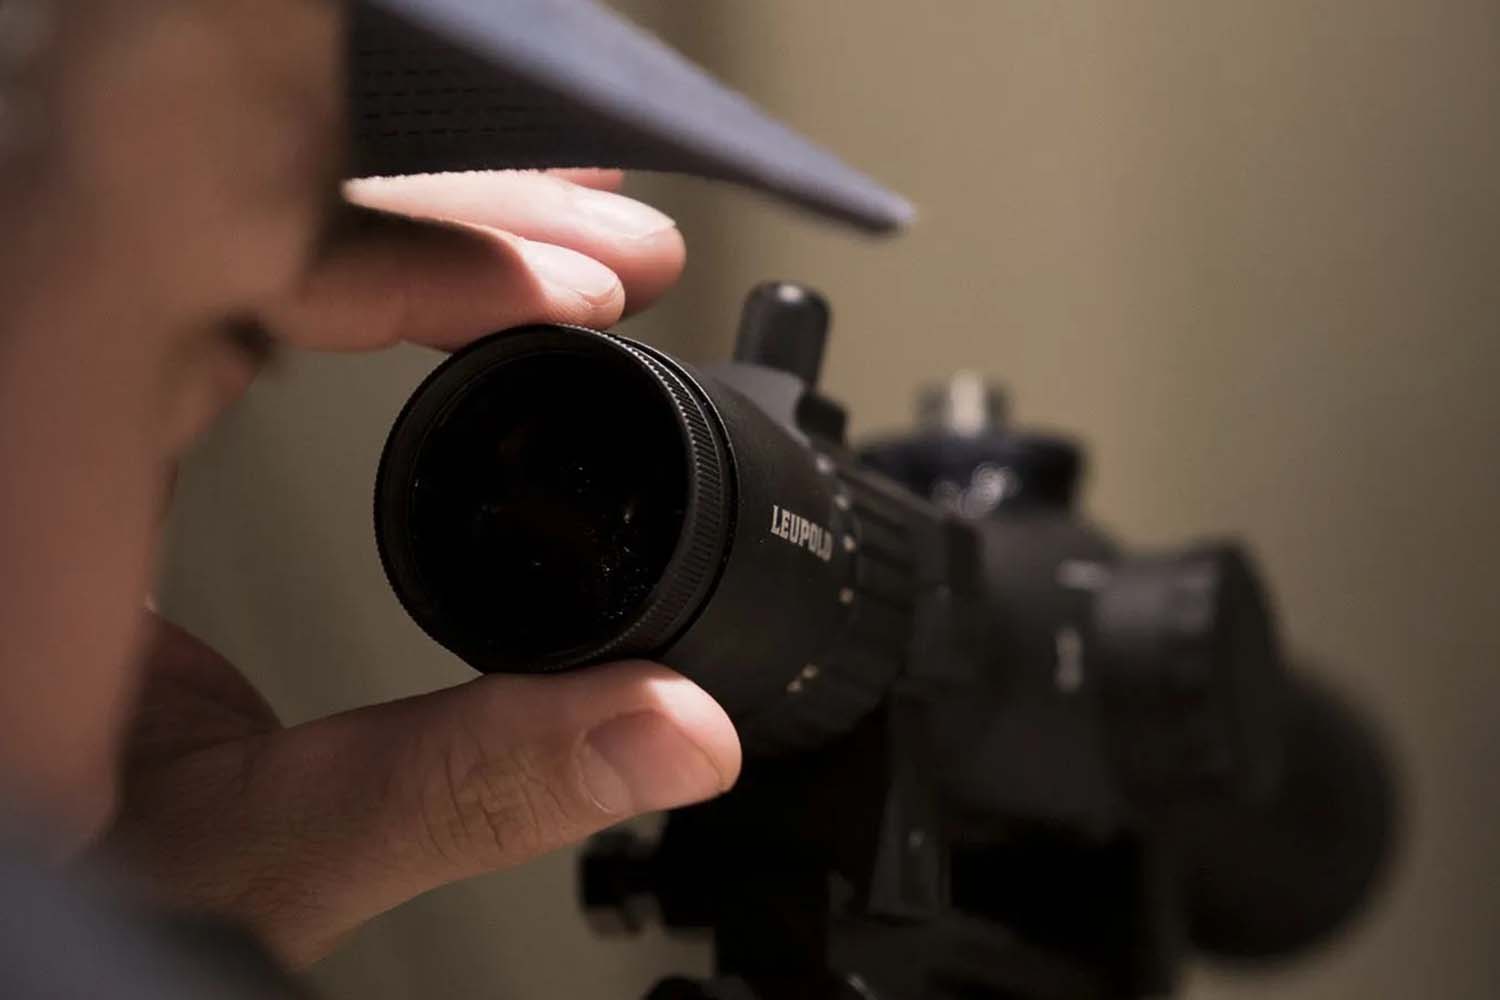
Knowing how to set up your scope for your body is critical to getting the best performance out of your optic. And since everyone’s built differently with different proportions, it’ll take some work to get it just right. One of the first things to consider is eye relief.
Eye relief is the point between the eyepiece lens and your eye where a full image can be observed. This point is different for every scope, so you’ll have to look up your model’s specs to know where it should sit on the rifle in relation to your eye. Also, note that eye relief slightly changes depending on what magnification you’re on. To get the best eye relief at any magnification, split the difference between the high and low eye relief numbers found on the specs sheet.
HOW TO SET YOUR EYE RELIEF
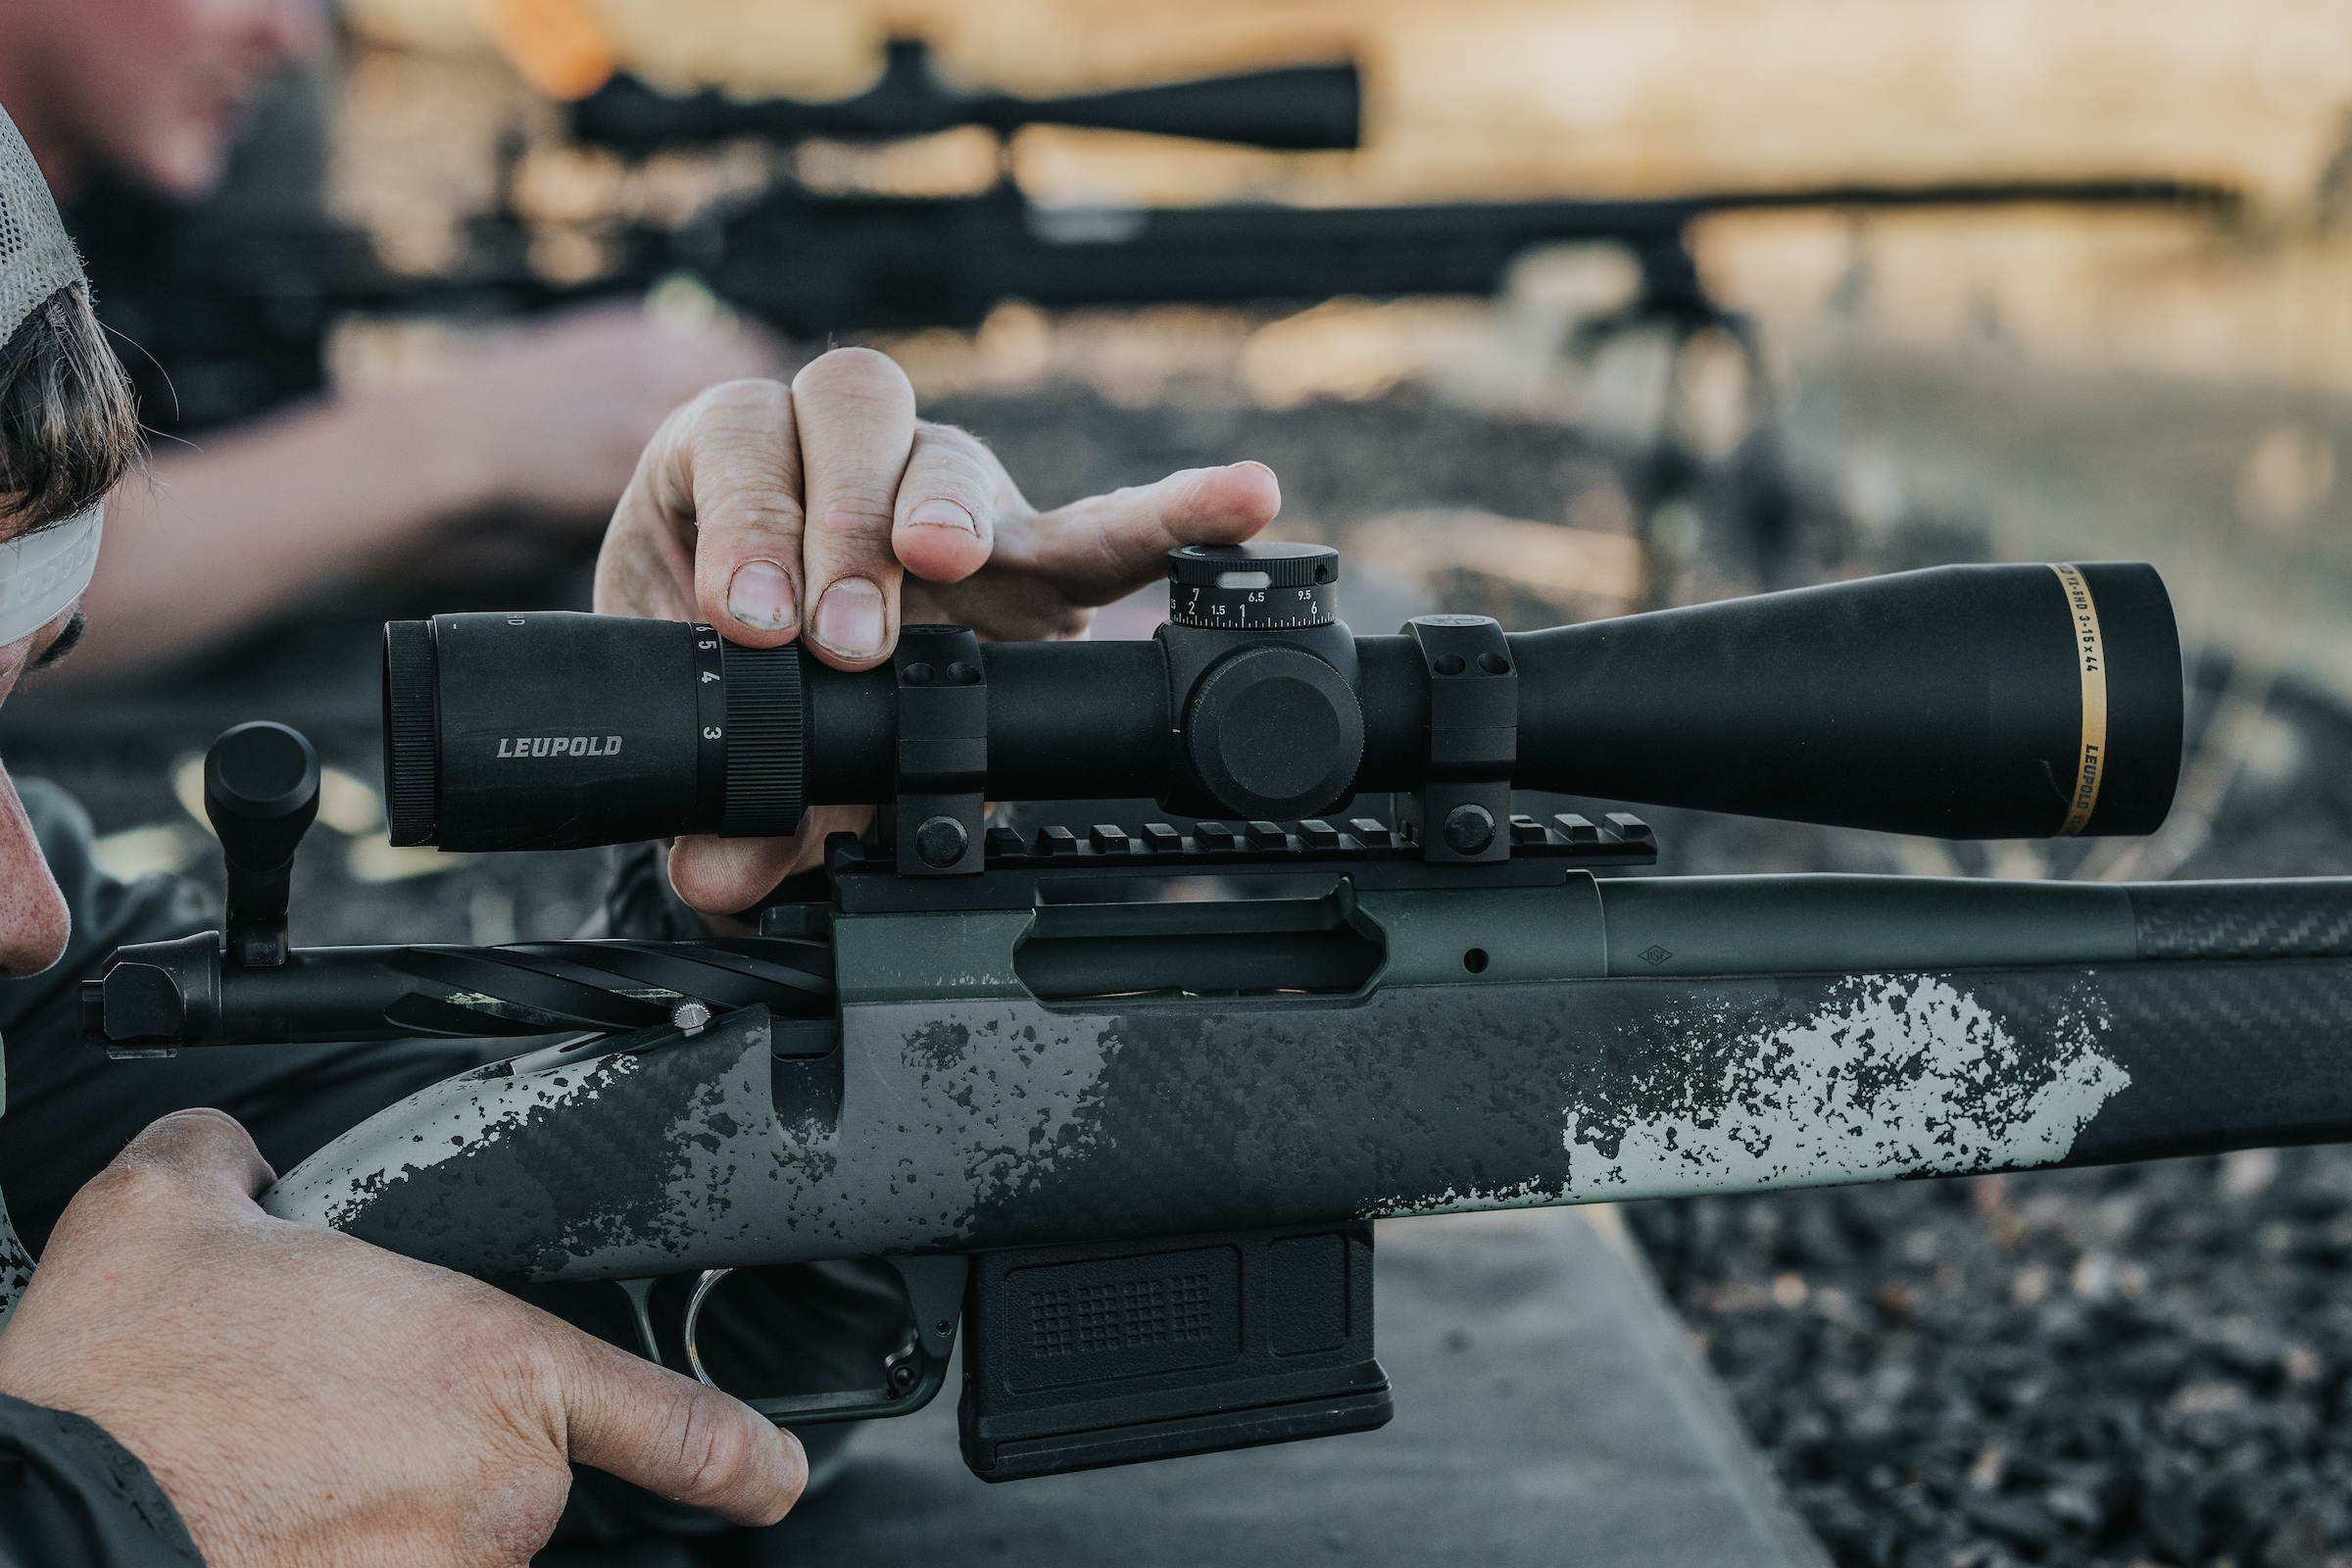
1. PLACE THE SCOPE in the rings and put the ring tops on, but not tightly. Make sure the scope can still move around. The scope on should be on its highest power which provides the smallest exit pupil size. This is critical because you want to make sure your alignment is perfect with the lowest exit pupil.
2. MOUNT THE RIFLE as if you were going to shoot – ideally, this is done on a table or stable platform. When looking through the scope, you want to be able to see a large image that fills the eyepiece. If you’re too close or too far away, you’ll get a lot of black around the image, which is called a vignette.
3. SHOULDER THE RIFLE WITH YOUR EYES CLOSED.Get in a comfortable shooting position that you’ll be able to duplicate every time you take aim. Once you feel comfortable, open your eyes to see where the eye relief is. You want to tailor the scope to your natural point of aim, not the other way around.
4. REPEAT THE PREVIOUS STEP until the scope is exactly where it needs to be. Remember, if done correctly, the image will completely fill the eyepiece – there shouldn’t be any black edges around your sight picture. Once your eye relief is set, make a mark with a pencil on the maintube where the rear ring meets it. This way, you'll know if the scope moves during the leveling process.
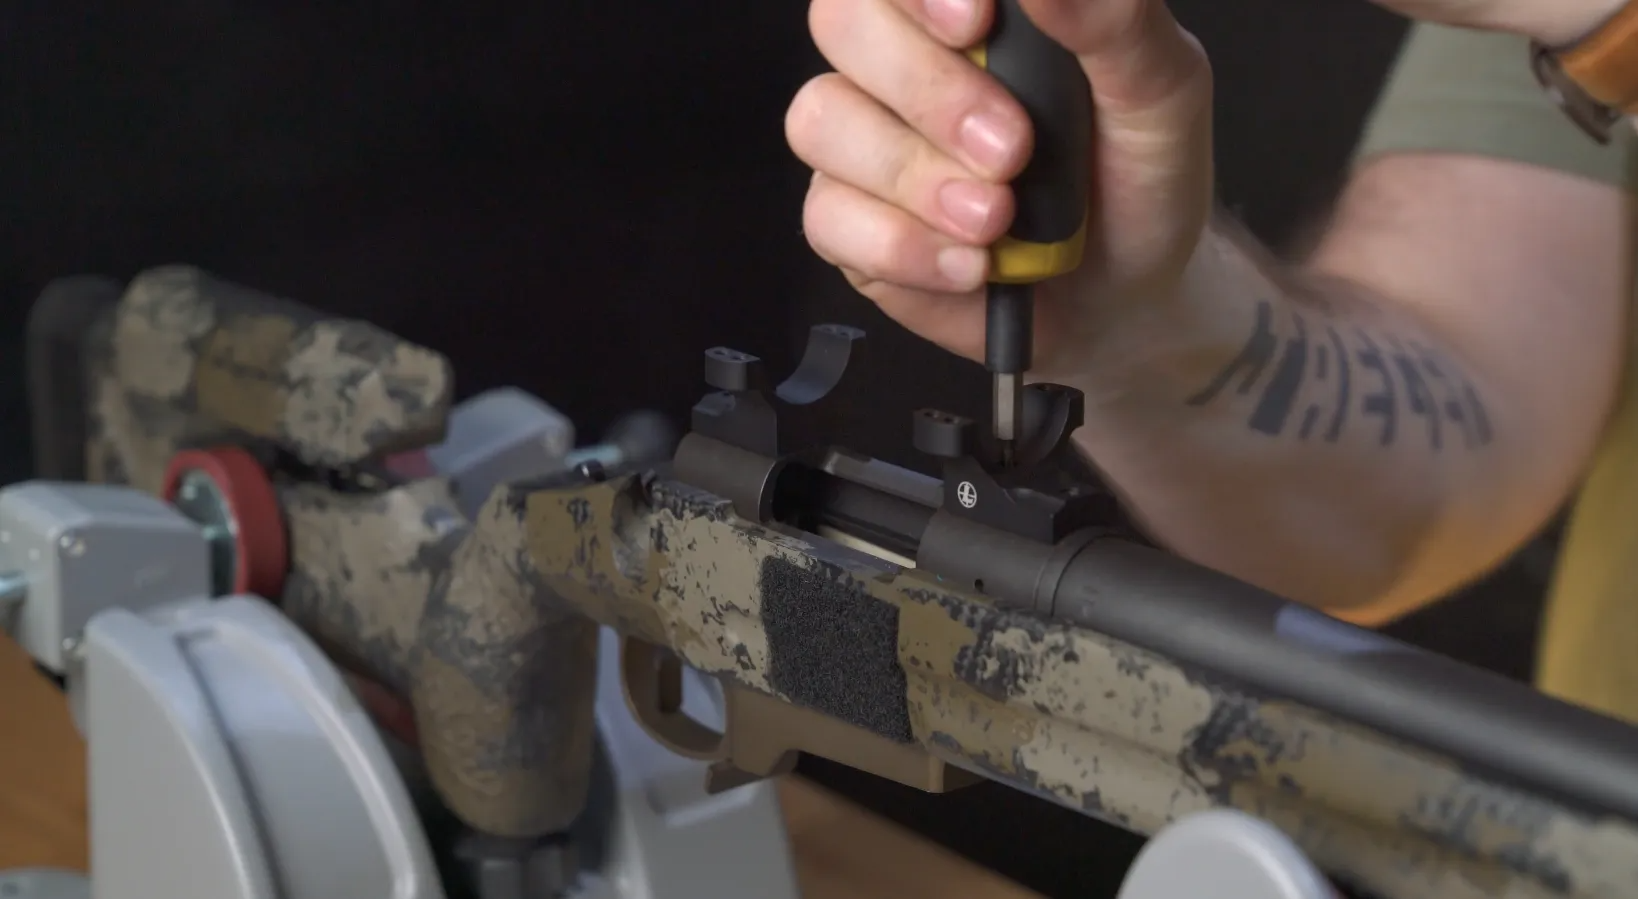
LEVEL THE SCOPE
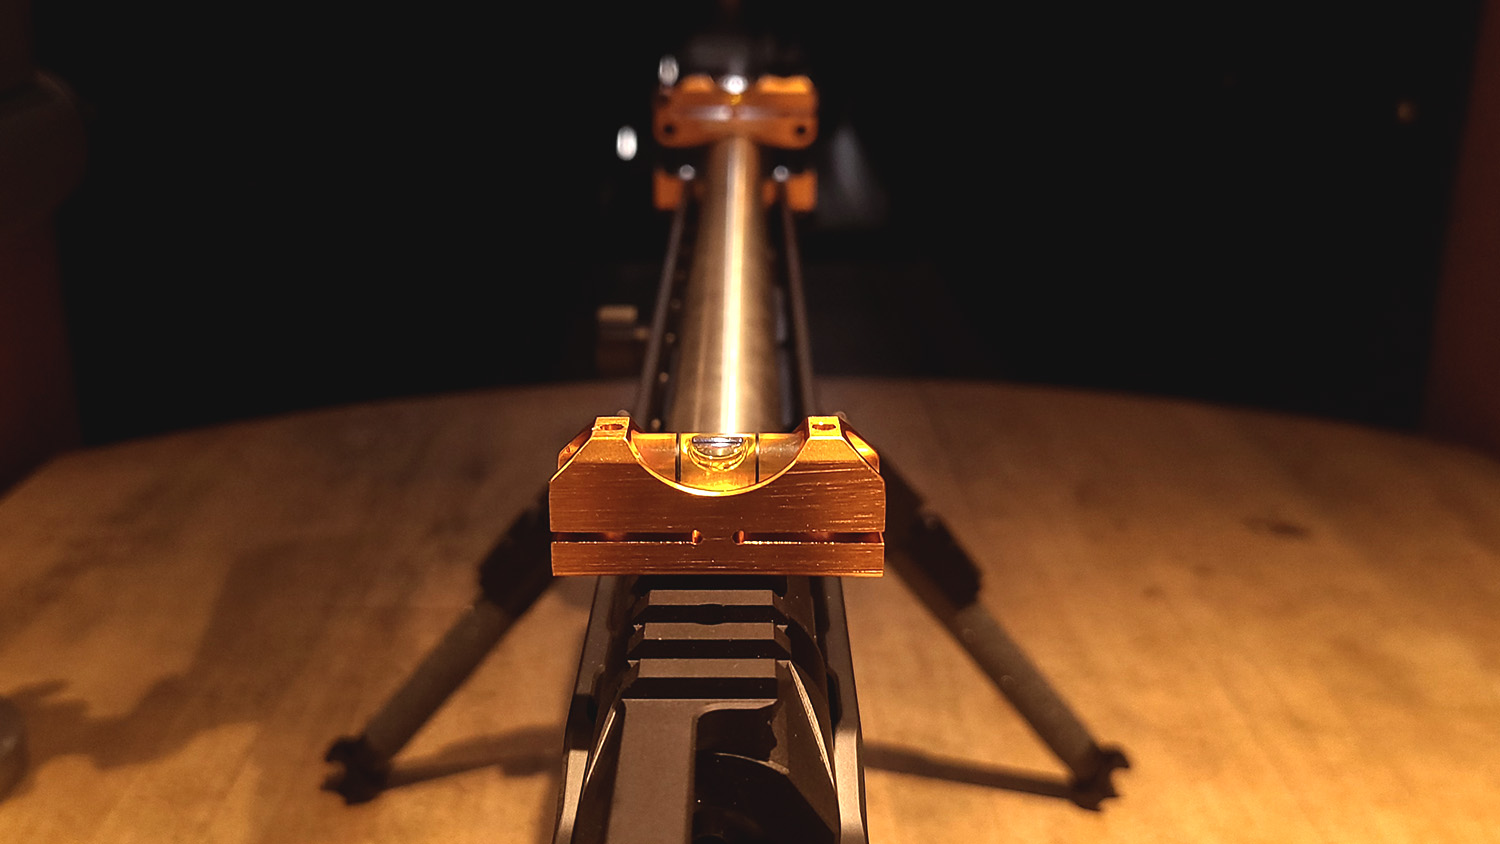
After you determine the right eye relief, you’ll need to level the scope. Leveling the scope to the rifle's action is extremely important for precise shot placement – especially at long distance ranges. Investing in a high-quality leveling kit will make this process simple and repeatable.
Place the small level on top of the mount base. In this scenario, we have a picatinny rail so the level goes directly on that (if using rings like our one-piece Backcountry Mounts, place the level on the bottom half of the ring/base combo). Once the action is level, attach the barrel clamp level to the end of the barrel. Confirm the action is still level, and adjust the barrel clamp level to match.
Once the correct eye relief is established place the smaller level on the top of the scope (with the dial removed). Move the rifle until the bubble level on the barrel is level. Then rotate the scope in the rings until the bubble level on it matches the level on the barrel. Begin tightening one of the ring tops in a star pattern until the 26 in pound torque spec is met. Keep an eye on the level while tightening as the scope can move during this process. If it does, loosen the ring top, adjust the scope, and re-tighten.
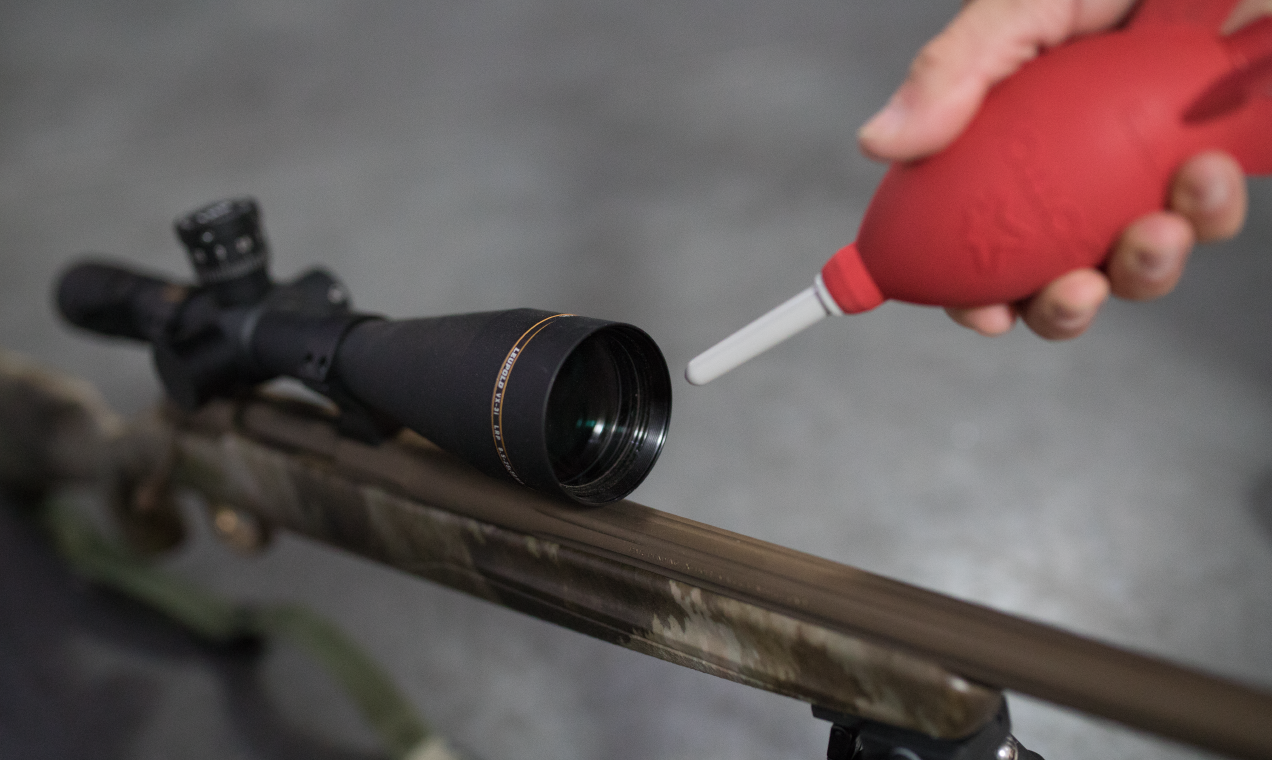
FOCUSING THE EYEPIECE
Focusing the eyepiece ensures the reticle looks clear for your eyes. Generally speaking, younger eyes have an easier time focusing. As we get older, our eyes deteriorate and don’t focus as easily, which is why most people need reading glasses as they age. Younger shooters usually have a negative adjustment, meaning the eyepiece focus is twisted all the way in. Older shooters will generally have a positive setting, so the eyepiece is twisted further out.
The eyepiece focus is located on the eyepiece end of the scope, closest to your eye. And while there are a few different types, standard and fast focus are the two most common. With the standard type, the whole eyeshell twists. But when operating the fast-focus type, an inner rotating piece turns the lens while the eyeshell stays in place.
With the rifle on a stable platform, point the scope towards a bright, solid color background. The brighter the background, the easier it’ll be to see the reticle. Shoulder the rifle and get into your standard shooting position, then simply turn the eyepiece focus until the reticle is nice and crisp. The scope is now tuned for you.
Recommended For You
Mounting a rifle scope properly is integral to getting and staying on target, shot after shot. Learn how to install the three most common mount styles for your rifle.
Our optics are built for a lifetime of performance, guaranteed. But with all this extended use in rugged conditions, we know they are bound to get dirty. In this article, we'll break down when and how to clean your riflescope properly to help make sure it performs at the highest level.